25.05.2026
How to build a moisture-resistant and durable sauna room
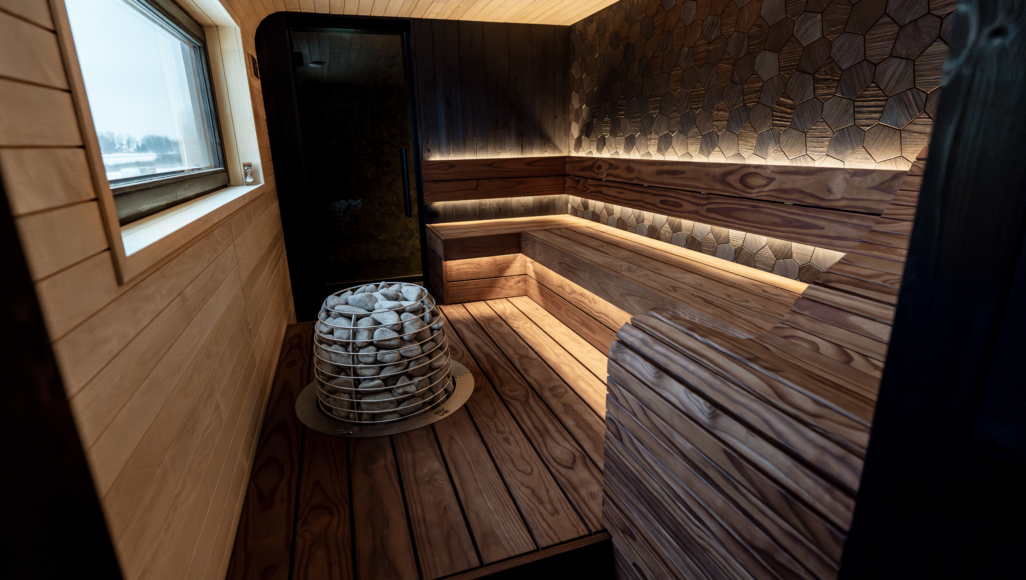
When building a sauna, walls and ceilings are not merely surfaces that enclose the room — they are structural assemblies designed to withstand extreme conditions, including heat, moisture, steam, and constant temperature fluctuations.
For this reason, sauna walls and their junctions with horizontal structures play a critical role in the overall performance of the sauna room.
A poorly constructed sauna wall can lead to mould growth, moisture damage, or unpleasant odours within just a few years — even when high-quality materials have been used.
This article on sauna planning is based on the practical observations and years of experience of HUUM’s architect Arden Arroval in planning both home and custom saunas.
A common principle in sauna construction is: “measure twice, cut once”. Sauna rooms are compact spaces that require precision, careful detailing, and a well-planned construction sequence.
The indoor climate of a sauna does not depend on a single component, but rather on how the walls, floor, and ceiling function together, and how effectively the insulation, vapour barrier, and ventilation have been designed.
In construction terminology, a junction detail refers to the point where two building elements meet — for example, where a wall connects to the floor or ceiling.
These connection points often determine whether a sauna remains dry and durable for decades or begins to develop moisture-related problems over time.
The wall must also support structural loads
In addition to being moisture-resistant, sauna walls must also be structurally strong. Bench supports and heavier elements — such as wall-mounted sauna heaters — should never be fixed through the insulation layer alone, but instead require a dedicated support structure.
This means that load-bearing attachment points for benches, backrests, and other heavier components must already be planned during wall construction.
If these elements are attached only to the timber cladding or insulation, the result will not be sufficiently strong or safe. Structural loads must be transferred to the load-bearing parts of the wall assembly or to specially installed reinforcements.
It is also important to consider that sauna structures naturally expand and contract over time. Heat and moisture cause materials to swell, dry, and move slightly. For this reason, fixings must not only be strong, but also carefully designed to prevent loosening or deformation over time.
This is particularly important when sauna benches are partially supported by the wall or when heavier wall-mounted heaters are used. A properly designed support structure improves both the long-term durability and the safety of the sauna.
Sauna wall construction: insulation and vapour barrier
In modern saunas, additional internal insulation is often used to maintain a stable indoor climate.
Common solutions include foil-faced PIR boards or mineral wool insulation boards with an integrated aluminium foil layer, typically with a thickness of 30–50 mm.
It is essential that all board joints are carefully sealed with foil tape to create a continuous vapour-tight layer.
If the vapour barrier is not airtight, moisture can accumulate inside the structure, leading to condensation and mould growth. The same principle applies to service penetrations — ventilation openings and cable penetrations must be completely sealed.
Water vapour, or moisture-laden air, always moves from areas of higher pressure to lower pressure — in practice, from a warmer and more humid environment towards a colder one.
Even a small gap or discontinuity in the vapour barrier may allow moisture to enter the wall structure and condense inside it over time. The problem may not become visible immediately, but over the years it can lead to serious moisture-related damage.


Figure 1. Vertical timber cladding, horizontal ventilation battens, and PIR insulation board.


Figure 2. Vertical timber cladding with vertical and horizontal ventilation battens and PIR insulation board.


Figure 3. Horizontal timber cladding with vertical ventilation battens and PIR insulation board.


Figure 4. Horizontal timber cladding with vertical ventilation battens and mineral wool insulation.
Wall junctions: critical connection details
In sauna construction, junctions are the most sensitive parts of the structure — for example, where the floor meets the wall, where the wall connects to the ceiling, or where the sauna room adjoins the washroom. In wet areas, waterproofing must be fully watertight and should preferably be installed as part of a complete system from a single manufacturer to ensure reliable connections between the floor and wall assemblies.
Between the washroom and the sauna room, situations may arise where two vapour-tight surfaces are positioned adjacent to one another. In such cases, the separating wall should be connected to the space above the suspended ceiling to prevent moisture accumulation and mould growth.
In sauna construction, problems most commonly occur not on large surfaces, but at junctions, penetrations, and connection points. For this reason, junction details should always be carefully planned before construction begins, and where necessary, supported by manufacturer-approved details and installation guidelines.


Figure 5. Floor-to-wall junction with vertical timber cladding, double ventilation battens, and PIR insulation.


Figure 6. Floor-to-wall junction with horizontal timber cladding, vertical ventilation battens, and PIR insulation.


Figure 7. Floor-to-wall junction with vertical timber cladding, horizontal ventilation battens, and mineral wool insulation.


Figure 8. Ceiling-to-wall junction with vertical timber cladding, horizontal ventilation battens, and mineral wool insulation.


Figure 9. Wall-to-ceiling junction with vertical timber cladding, double ventilation battens, and PIR insulation board.


Figure 10. Wall-to-ceiling junction with horizontal timber cladding, vertical ventilation battens, and PIR insulation board.
Ventilation gap – the sauna wall’s “breathing space”
A ventilation gap of at least 20 mm must be left between the interior cladding of the sauna room and the vapour barrier. The foil layer should never come into direct contact with the timber cladding, as airflow behind the cladding helps prevent excessive moisture build-up and allows the structure to dry properly.
The greatest threat to a sauna structure is not moisture itself, but moisture that cannot escape and dry out.
The installation of ventilation battens depends on whether the timber cladding is installed vertically or horizontally. Battens must always be fixed in the opposite direction to ensure continuous airflow behind the cladding.
If there is no ventilation gap behind the cladding, or if airflow is obstructed, the structure will dry more slowly, increasing the risk of mould growth and timber deterioration.
Should a sauna wall “breathe”?
It is often said that a sauna wall needs to “breathe,” but in reality, a well-functioning sauna structure is based on a different principle. A sauna room should not be air-leaky — on the contrary, the vapour barrier should be as airtight as possible. At the same time, the structure must be able to dry in a controlled manner after use.
This is precisely why properly designed ventilation gaps and effective ventilation are essential. If moisture enters the structure but cannot dry out, mould growth and moisture-related damage will gradually begin to develop over time.
Finishing
The finishing of a sauna should support the wall structure, not compromise it. For this reason, only products specifically designed for sauna use should be applied in the sauna room. One of the safest choices is a dedicated sauna wax, such as Tikkurila Supi Sauna Wax, which protects the timber against moisture and dirt while maintaining a natural and breathable surface. For sauna benches and backrests, sauna oil is often a more practical option, as it penetrates the timber without making the surface excessively hot or slippery.
Conventional lacquers, paints, and other non-specialised finishing products are not suitable for saunas. Under high temperatures, they may release harmful compounds, create unpleasant odours, or seal the timber surface too tightly, preventing the structure from drying properly.
A common mistake is using standard wood varnish or wall paint inside the sauna room. Under heat exposure, these coatings may crack, yellow over time, or begin to emit odours. Excessively dense surface coatings can also prevent the timber from drying naturally.
In many cases, it is entirely sufficient to leave the walls and ceiling untreated or to apply only a very light protective finish. The more natural the solution, the better the overall wall assembly — including the insulation, vapour barrier, and ventilation gap — will function, helping the sauna remain healthy and durable over time.
Conclusion
A sauna wall is far more than just finished timber cladding — it is a carefully engineered multi-layer system consisting of insulation, a vapour barrier, a ventilation gap, ventilation, and properly designed junction details. A correctly constructed wall ensures that the sauna heat remains soft and even, the structure lasts for decades, and moisture does not become a long-term problem.
In most cases, failures are caused not by the materials themselves, but by poorly executed details — particularly at junctions and in inappropriate finishing choices. When these elements are designed and installed correctly, the entire system functions as a whole, allowing the sauna to remain both technically reliable and comfortable to use.
Correctly constructed sauna wall assemblies may remain invisible to the eye, but they ultimately determine the sauna’s durability, safety, and steam quality for years to come.


